- Introduction
- What is Current?
- Upgrade Your Toolkit with Keysight’s Certified Pre-Owned Instruments
- 4 Ways to Measure Current in a Circuit
- Multimeters
- Ammeters
- Oscilloscopes
- Clamp Meters
- How to Choose Between Direct and Indirect Methods for Current Measurement
- How to Adapt Your Measurement Strategies for Low and High Currents
- Challenges in Measuring Very Low Currents
- Challenges in Measuring Very High Currents
- How to Troubleshoot Common Issues When Measuring Current
- The Importance of Calibration and Standards in Current Measurement
- Ensure Ongoing Accuracy with Keysight Calibration Services
- Upgrade Your Current Measurement Capabilities with Keysight
- Whenever You’re Ready, Here Are 5 Ways We Can Help You
Picture yourself perfecting a portable, solar-powered weather station designed to gather and transmit data from the heart of a dense forest. This gadget is meant to operate autonomously, collecting vital environmental data over months without human intervention. The catch? The key is to master the intricate art of power management. Here's where it gets tricky.
If the current measurement is even slightly off, your device might as well be a fancy paperweight, running out of juice long before it completes its task. This is more than just a job—it's a quest for precision that can make or break your project.
Mastering this skill is not merely about avoiding technical missteps; it's about empowering your projects to fulfill their intended roles in the real world, seamlessly and effectively.
Accurate current measurement is vital across many areas, such as in battery-powered devices to extend battery life, and in renewable energy systems like solar panels to maximize power generation.
This guide will equip electrical engineers and hobbyists with the knowledge to precisely measure current, enhancing the performance and reliability of their projects.
What is Current?
Electrical current is the flow of electric charge through a conductor, moving from one point to another. It's measured in amperes (A) and comes in two main types: Alternating Current (AC) and Direct Current (DC). AC current changes direction periodically, as seen in household power supplies, while DC current flows in one constant direction, typical of batteries.
The nature of the current is crucial for the functionality and performance of electrical and electronic devices. AC is used for power distribution due to its ability to travel long distances with less energy loss, while DC is favored in electronic devices for its stable and constant energy supply, ensuring reliability and efficiency.
Upgrade Your Toolkit with Keysight’s Certified Pre-Owned Instruments


4 Ways to Measure Current in a Circuit
Measuring current is a vital task in electrical engineering and electronics, essential for troubleshooting, designing, and maintaining circuits. Various tools and methods are available for this purpose, each with its unique advantages and ideal use-case scenarios.
Here's a brief overview of some of the most common tools used for measuring current: multimeters, clamp meters, ammeters, and oscilloscopes, along with any additional equipment they might require.
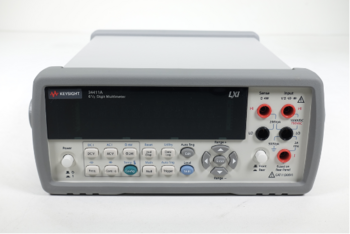
- Multimeters: Multimeters are versatile instruments capable of measuring voltage, resistance, and current (both AC and DC). For current measurement, they are connected in series with the circuit. Multimeters are ideal for general-purpose troubleshooting and diagnostics in various electronic and electrical projects.
- Clamp meters: Clamp meters measure current without needing to make physical contact with the conductor or interrupt the circuit. They work by clamping around a single wire and measuring the magnetic field to calculate the current flow. This makes them perfect for quick diagnostics in live circuits, especially in high-current scenarios like industrial applications.
- Ammeters: Ammeters are specifically designed to measure electric current and are also connected in series with the circuit. They offer higher precision than multimeters in current measurement but are limited to measuring current alone. Ammeters are used in situations where accurate current measurements are critical, such as in laboratory settings or precision engineering projects.
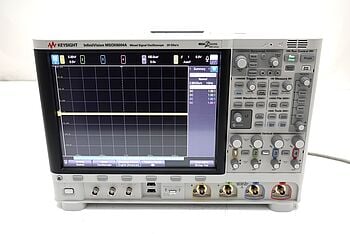
- Oscilloscopes: While primarily used for viewing the waveform of electrical signals, oscilloscopes can also measure current with the help of a current probe. This allows for the observation of current changes over time, making oscilloscopes ideal for analyzing the performance of electronic devices, debugging, and research.
Additional equipment like shunts and current probes may be needed for accurate measurements, especially when dealing with high currents or specific measurement conditions.
Comparison Table
| Feature | Multimeter | Ammeter | Oscilloscope | Clamp Meter |
| Measurement Type | AC/DC Voltage, Current, Resistance | Current Only | Current (with probe), Voltage, Time-based Signal Analysis | AC/DC Current (Non-contact) |
| Use Cases | General troubleshooting, DIY projects, maintenance | Precision current measurement in labs, dedicated current measurement tasks | Signal analysis, waveform viewing, advanced troubleshooting | Quick diagnostics, measuring in live circuits without interruption |
| Limitations | Limited by the need to be in series with the circuit, possibly altering the circuit behavior | Limited functionality beyond current measurement | Requires current probes for current measurement, higher complexity and cost | Accuracy can vary with distance from wire, limited to measuring individual conductors |
This table offers a snapshot of the capabilities, ideal scenarios, and limitations of each tool, helping you choose the right instrument for your specific needs in measuring current in circuits.
Multimeters
Multimeters are essential tools in the arsenal of any electrical engineer or hobbyist. They are versatile instruments capable of measuring multiple electrical properties, including voltage (both AC and DC), current (both AC and DC), and resistance. Some advanced models can also measure other parameters such as capacitance, frequency, and temperature, making multimeters truly multi-functional devices.
Measuring Current with a Multimeter
To measure current using a multimeter, follow these detailed steps:
- Safety first: Ensure the multimeter and its probes are rated for the current you expect to measure.
- Prepare the multimeter: Set the multimeter to the current measurement mode. This is typically indicated by an "A" on the dial for amperes. Choose AC or DC mode based on the current type in your circuit.
- Power off the circuit: Before connecting the multimeter, make sure to power off the circuit to prevent any potential damage or injury.
- Connect in series: For current measurement, you need to connect the multimeter in series with the circuit. This means you'll have to open the circuit and connect the multimeter's probes across the two points where the circuit was opened. This allows the current to flow through the multimeter.
- Select the correct range: If your multimeter is not auto-ranging, select the appropriate current range. If unsure of the current to be measured, start with the highest range and then decrease to get an accurate reading without overloading the multimeter.
- Power on the circuit: Once the multimeter is securely connected in series and set to the correct mode and range, power on the circuit.
- Read the measurement: Observe the reading on the multimeter's display. Ensure you're reading the correct unit of measurement, noting whether it's in milliamperes (mA), microamperes (µA), or amperes (A).
- Power off and disconnect: After taking your measurements, turn off the circuit before disconnecting the multimeter to ensure safety.
- Return to voltage measurement setting: To avoid accidents or damage in future use, it's a good practice to set the multimeter back to voltage measurement mode after you're done measuring current.
These steps should enable you to accurately and safely measure the current in a circuit using a multimeter, providing valuable insights into the circuit's performance and helping identify potential issues.
Ammeters
Ammeters are specialized instruments designed specifically for measuring electrical current in a circuit. Unlike multimeters, ammeters have a singular focus on current measurement, offering higher precision and sensitivity for this task. They are optimized to introduce minimal resistance into the circuit, thus ensuring that their presence does not significantly alter the current flow they are meant to measure.
Integrating an Ammeter into a Circuit
To achieve accurate current measurement, an ammeter must be integrated correctly into the circuit. Here's how you can do this effectively:
- Understand the circuit: Before attempting to measure current, it's crucial to have a basic understanding of the circuit's layout and where the measurement will be most meaningful.
- Select the correct ammeter: Ensure the ammeter is capable of measuring the expected range of current in your circuit. Consider both the maximum current and the sensitivity needed for your application.
- Power off the circuit: Always start by turning off the circuit to prevent any electrical accidents or damage to the ammeter.
- Open the circuit: Find the point in the circuit where you wish to measure the current and carefully open the circuit at this point. This could involve unsoldering a connection, disconnecting a connector, or cutting a wire, depending on your circuit's design.
- Connect the ammeter: Insert the ammeter in series at the point you've opened the circuit. This means connecting one terminal of the ammeter to the upstream side of the open circuit and the other terminal to the downstream side. The ammeter should now be part of the circuit path, allowing all the current to flow through it.
- Secure connections: Ensure all connections are secure and that there's no risk of short circuits or loose connections that could affect the measurement or the circuit's operation.
- Power on the circuit: With the ammeter correctly in place, turn the circuit back on. It's important to monitor the ammeter immediately after powering on to ensure that the current is within the expected range and that there are no sudden spikes that could indicate a problem.
- Read the measurement: Take note of the current reading on the ammeter, ensuring you're interpreting the scale correctly, whether it's in amperes, milliamperes, or another unit.
- Power off and remove the ammeter: Once you've completed your measurements, turn off the circuit before safely removing the ammeter. This ensures both your safety and the integrity of the circuit.
- Restore the circuit: After removing the ammeter, reconnect or re-solder the open point in the circuit to restore it to its original condition.
By following these steps, you can accurately and safely measure the electrical current in a circuit using an ammeter, providing valuable insights for troubleshooting, design validation, or performance evaluation.
Oscilloscopes
Oscilloscopes are sophisticated electronic instruments that graphically display electrical signals as they vary over time. While primarily used for observing the waveform of voltage signals, oscilloscopes can indirectly measure current by analyzing the voltage drop across a known resistor, utilizing Ohm's law (V=IR). This method allows for the dynamic analysis of current changes over time, providing valuable insights into the behavior of electronic devices and circuits under different conditions.
Advantages of Using Oscilloscopes for Current Measurement
- Dynamic analysis: Oscilloscopes excel at capturing and analyzing transient events and fluctuations in current over time, offering a real-time view of circuit performance.
- Waveform visualization: They provide a visual representation of how current varies with time, making it easier to identify issues like spikes, noise, or other irregularities.
- Versatility: Beyond current measurement, oscilloscopes can be used for a wide range of signal analysis tasks, making them a versatile tool in the lab.
Measuring Current with an Oscilloscope: Step-by-Step
- Select a known resistor: Choose a resistor with a known resistance value (R) to insert into your circuit. The resistance should be low enough not to significantly affect the circuit's operation but high enough to create a measurable voltage drop.
- Insert the resistor into the circuit: Break the circuit at the point where you want to measure the current and insert the resistor in series. This will be the point where the voltage drop, correlating to the current flow, will be measured.
- Connect the oscilloscope probes: Attach one oscilloscope probe to each side of the resistor. Ensure the ground clip of one probe is connected to the circuit ground.
- Configure the oscilloscope: Set up the oscilloscope to the appropriate voltage scale and time base for the expected signal. Adjust the trigger settings to stabilize the waveform display.
- Power on the circuit: With the circuit and oscilloscope set up, turn on the circuit. Observe the waveform that appears on the oscilloscope screen.
- Measure the voltage drop: Use the oscilloscope's measurement functions to determine the peak-to-peak or average voltage drop across the resistor.
- Calculate the current: Apply Ohm's law (I = V/R) using the measured voltage drop (V) and the known resistance (R) to calculate the current flowing through the circuit.
- Analyze the waveform: Use the oscilloscope's capabilities to analyze how the current changes over time. Look for any unexpected fluctuations that might indicate issues within the circuit.
- Document your findings: Many oscilloscopes offer the ability to save waveform images or data, allowing you to document your measurements for further analysis or reporting.
By following these steps, you can leverage an oscilloscope's advanced features to measure and analyze current in a circuit, offering insights not just into the amount of current, but also its behavior over time, which can be crucial for diagnosing problems or optimizing circuit performance.
Clamp Meters
Clamp meters operate on the principle of magnetic induction to measure current flow without requiring direct contact with the conductors or interrupting the circuit. This non-invasive approach makes them exceptionally useful for quickly checking the current flow in cables and wires in a safe and efficient manner.
Principle of Operation and Usefulness
- Non-invasive measurement: Clamp meters measure the magnetic field around a conductor generated by the current flow. This allows for safe measurements without the need to expose wires or halt the circuit’s operation.
- Ideal scenarios: They are particularly useful in situations where the circuit cannot be turned off, for measuring high currents, or when the conductors are not easily accessible. Electricians often use clamp meters for troubleshooting electrical installations and maintenance.
Measuring Current with a Clamp Meter: Step-by-Step
- Safety first: Ensure the clamp meter is rated for the current range you expect to measure and is in good working condition.
- Zero the meter: Before measuring, close the clamp meter’s jaws and zero it out if it has this feature. This ensures any residual magnetic field does not affect your measurement.
- Select the correct mode: Choose AC or DC current measurement mode based on the type of current you intend to measure.
- Open the clamp jaws: Press the lever or button on the clamp meter to open the jaws.
- Clamp around the conductor: Position the clamp meter so its jaws encircle a single conductor. Do not clamp around multiple wires or both the supply and return conductors together, as this will result in a net current of zero or incorrect readings.
- Take the measurement: Once the jaws are securely around the conductor, look at the display to read the current measurement. Ensure you're reading the correct unit (amperes, milliamperes, etc.).
- Remove the clamp meter: After recording your measurement, carefully remove the clamp meter from around the conductor.
- Power down and store: Turn off the clamp meter and store it properly to extend its life and maintain its accuracy.
Additional Tips
- Direction of current: For some clamp meters, the direction in which you clamp around the wire (relative to the flow of current) can affect the reading. Consult the user manual to understand if this applies to your meter.
- Avoid external magnetic fields: Try to measure in areas free from strong external magnetic fields to avoid measurement errors.
By following these steps, you can safely and accurately measure current in a variety of settings, making the clamp meter an invaluable tool for quick diagnostics and checks in both residential and industrial applications.
How to Choose Between Direct and Indirect Methods for Current Measurement
When measuring current in electrical circuits, you can opt for either direct or indirect methods. Each approach has its advantages and limitations, influencing the choice based on the specific measurement context and requirements.
Direct Methods
Pros:
- High accuracy and precision in measurement.
- Direct interaction with the circuit allows for specific point measurements.
- Ideal for low-current measurements and detailed circuit analysis.
Cons:
- Requires physical access to the circuit, potentially disrupting operation.
- Safety risks due to direct contact with electrical components.
- Limited by the need to interrupt the circuit for insertion of the measuring device.
Ammeters and multimeters used in series with the circuit are prime examples of direct measurement tools.
Indirect Methods
Pros:
- Non-invasive and does not require circuit interruption.
- Safer to use, especially in high-current or high-voltage scenarios.
- Quick and easy to apply, suitable for rapid diagnostics and monitoring.
Cons:
- May offer less precision compared to direct methods.
- Can be influenced by external factors such as adjacent magnetic fields.
- Requires calibration and understanding of the underlying principles for accurate measurement.
Clamp meters measuring current through magnetic induction and oscilloscopes using voltage drop across a known resistor to infer current are examples of indirect measurement.
Choosing the Right Method
- For precision and detailed analysis: Direct methods are preferred when the utmost accuracy is required, such as in circuit design testing or fault analysis in low-current applications.
- For safety and convenience: Indirect methods are ideal for quick checks, high-current applications, or when the circuit cannot be safely or easily accessed, such as in industrial power monitoring or troubleshooting live systems.
The choice between direct and indirect current measurement methods ultimately depends on the specific requirements of the task, including the need for accuracy, safety considerations, and the practicality of interacting directly with the circuit.
How to Adapt Your Measurement Strategies for Low and High Currents
Measuring currents at the extremes of the spectrum, both very low and very high, presents unique challenges that require specific strategies, tools, and precautions to ensure accuracy and safety.
Challenges in Measuring Very Low Currents
- Sensitivity and noise: Very low currents can be easily overshadowed by noise and the inherent sensitivity limits of measuring instruments.
- Connection resistance: Even minor resistances in connections can affect measurements significantly.
Tools and Techniques for Low Currents
- Precision ammeters and multimeters: Instruments with high sensitivity and low internal noise.
- Shielded cabling and enclosures: To reduce external noise interference.
- Careful calibration: Ensure instruments are properly calibrated to measure small currents accurately.
Safety and Accuracy
- Avoid physical contact: Minimize contact with circuit components during measurement to prevent introducing additional resistance or static charges.
- Use short, direct connections: To reduce the introduction of additional resistances or inductances.
Challenges in Measuring Very High Currents
- Safety risks: High currents can pose serious safety risks, including shock and arc flash.
- Instrument limitations: Many instruments cannot handle high currents directly due to the risk of damage or inaccurate readings.
Tools and Techniques for High Currents
- Clamp meters: Allow for safe, non-contact measurement of current through magnetic induction.
- Current transformers (CTs): Used to step down high currents to a lower, more manageable level that can be measured safely.
- Hall effect sensors: For non-intrusive measurements, offering a wide range of current detection capabilities.
Safety and Accuracy
- Observe safety protocols: Use appropriate personal protective equipment (PPE) and follow established safety procedures.
- Regular calibration and verification: Ensure your measurement tools are regularly checked for accuracy and reliability, especially when dealing with high currents.
Choosing the Right Tool
- Low currents: Precision and shielding are paramount. Instruments specifically designed for low current measurements should be selected.
- High currents: Safety and indirect measurement methods take precedence. Tools that can safely measure high currents without direct electrical contact are preferred.
Adapting your measurement strategy to effectively and safely handle the extremes of current measurement requires a careful selection of tools, awareness of the inherent challenges, and adherence to best practices for accuracy and safety.
How to Troubleshoot Common Issues When Measuring Current
When measuring current, several issues can arise that may affect the accuracy of your measurements or even cause instrument malfunctions and circuit problems. Understanding these issues and knowing how to troubleshoot them is crucial for anyone working with electrical circuits.
Troubleshooting Table
| Common Issues | Solutions or Tips |
| Inaccurate Readings |
|
| Instrument Not Responding |
|
| Circuit Interference |
|
| Zero Reading When Measuring |
|
| Fluctuating Readings |
|
| Safety Concerns |
|
Troubleshooting effectively often requires a systematic approach to isolate the issue, whether it's related to the measurement setup, the instrument itself, or the circuit under test.
The Importance of Calibration and Standards in Current Measurement
In current measurement and electrical safety, adherence to international and national standards is paramount. Standards such as the International Electrotechnical Commission (IEC) standards, the American National Standards Institute (ANSI), and the National Institute of Standards and Technology (NIST) guidelines play critical roles. They ensure consistency, accuracy, and safety across various applications and industries.
Calibration is a crucial process for measurement devices, directly impacting their accuracy and reliability. It involves adjusting the measurements of an instrument to align with those of a standard known to be accurate. This process ensures that devices produce results within an acceptable range, minimizing measurement errors and enhancing the integrity of data collected.
Regular calibration is necessary to ensure accurate measurement instruments. It is best to calibrate them annually, or as advised by the manufacturer. Accredited laboratories such as Keysight Technologies offer calibration services, ensuring instruments are measured against recognized standards. These practices not only uphold the quality of measurements but also ensure compliance with safety and operational standards, essential for industries where precision is critical.
“For all used equipment, I offer my clients calibration and 1-year warranty.” – Keysight Account Manager
Ensure Ongoing Accuracy with Keysight Calibration Services
Upgrade Your Current Measurement Capabilities with Keysight
This guide has walked you through the essentials of current measurement, underlining its critical role in the success and reliability of electrical and electronic projects. From the subtle challenges of measuring low currents to the dangers associated with high current levels, we've covered the spectrum, emphasizing the importance of precision and safety.
Do you recall the initial concern regarding the possibility of minor errors causing significant issues in your designs? That's exactly why mastering current measurements is vital for engineers and hobbyists alike.
As you apply this knowledge, let safety be your guidepost and precision your target. Regular calibration and adherence to standards ensure your measurement tools are as dependable as they are accurate.
By prioritizing these principles, you're not just performing routine tasks; you're elevating your projects to new heights. Elevate your current measurement practices and witness your projects transform from ordinary to extraordinary, measurement by measurement. This isn't just about avoiding errors—it's about unlocking the full potential of your work, ensuring each project not only succeeds but excels.
Whenever You’re Ready, Here Are 5 Ways We Can Help You
- Browse our premium used network analyzers, oscilloscopes, signal analyzers and waveform generators.
- Call tech support US: 1 800 829-4444
Press #, then 2. Hours: 7am – 5pm MT, Mon– Fri - Talk to our sales support team by clicking the icon (bottom right corner) on every offer page
- Create an account to get price alerts and access to exclusive waitlists.
- Talk to your account manager about your specific needs